

Table of Contents
Red Velvet Crinkle Cookies: The Only Recipe You’ll Ever Need
Imagine biting into a soft, chewy Red Velvet Crinkle Cookie that boasts a dramatic crinkle top and rich, velvety flavor—perfect for holiday gatherings or a cozy treat. Red Velvet Crinkle Cookies have long been a favorite for their vibrant hue and indulgent taste, but what sets this recipe apart is our expert chilling technique that ensures the perfect crinkle every time. As a top recipe on lalytarecipes.com, we’re sharing the secrets to foolproof baking, making these cookies a go-to for home cooks. Whether you’re a beginner or a pro, this version delivers that classic red velvet magic with minimal effort and maximum wow factor.
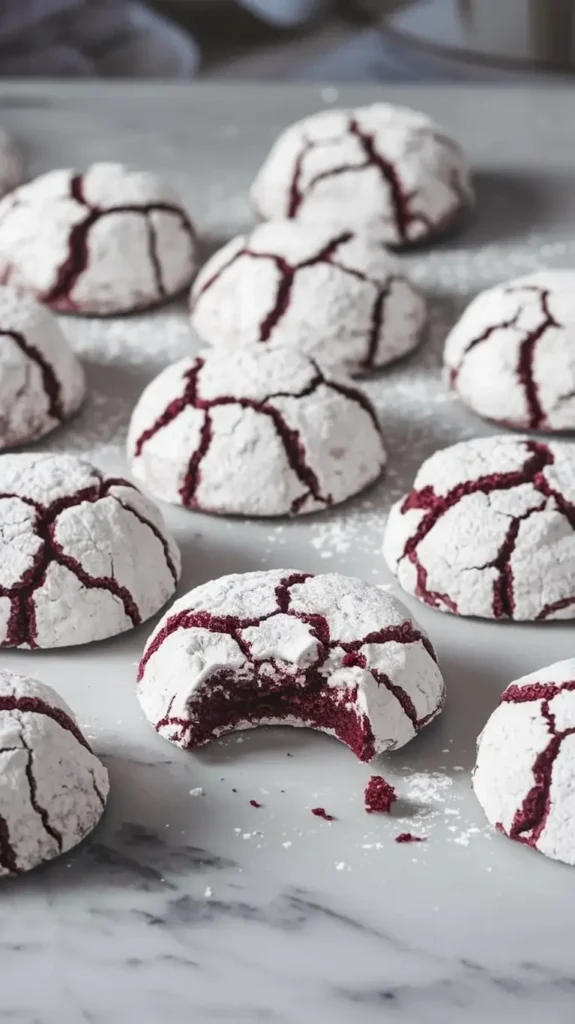
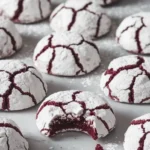
These Red Velvet Crinkle Cookies tantalize with their deep cocoa undertones, balanced by a hint of vanilla that dances on your palate. The texture is pure bliss: a crackly, sugar-dusted exterior that gives way to a moist, chewy center, creating an irresistible contrast. Fresh from the oven, the aroma fills your kitchen with warm, buttery notes mixed with the subtle earthiness of cocoa powder, evoking memories of childhood bake sales or festive celebrations. Picture the bright red color peeking through the powdered sugar coating—it’s not just a cookie; it’s a visual and sensory delight that will have everyone reaching for seconds.
Why trust this Red Velvet Crinkle Cookies recipe from lalytarecipes.com? Crafted by Chef Lalyta and tested in real home kitchens, it’s designed for consistent success, incorporating our chef’s secret for an unbeatable crinkle effect. You’ll learn insider tips, from ingredient swaps to baking hacks, that make this the single best resource online. Dive in to discover how a simple chilling step elevates your baking game, ensuring soft, chewy results that outshine store-bought versions. Let’s turn you into a red velvet expert with this comprehensive guide.
Why This Red Velvet Crinkle Cookies Recipe is a Game-Changer
Our unique selling proposition lies in the expert chilling technique for the perfect crinkle, which sets this Red Velvet Crinkle Cookies recipe apart from the rest. By chilling the dough for at least an hour, we ensure the ingredients firm up, allowing for that signature crinkled top when baked. This isn’t just a step; it’s the key to achieving a bakery-quality finish that locks in moisture and enhances the soft, chewy texture, making your Red Velvet Crinkle Cookies stand out at any event.
The science behind the unbeatable texture involves the interaction of baking powder and soda with the cocoa powder, which creates air pockets during baking. When combined with our chilling method, it results in a cookie that’s tender inside and crinkly outside, without over-spreading. This recipe has been tested multiple times in our kitchens to guarantee foolproof results, even for novice bakers, ensuring every batch of Red Velvet Crinkle Cookies turns out perfectly soft and chewy.
Red Velvet Crinkle Cookies are reliable because we’ve accounted for common pitfalls, like uneven baking, by providing precise measurements and tips. This version is the result of iterative testing, promising success on your first try and delivering that authentic red velvet flavor with a modern twist.
Ingredient Spotlight: Quality Makes the Difference
All-Purpose Flour (2 cups): This staple provides the structure for your Red Velvet Crinkle Cookies, giving them a soft and chewy base without being too dense. Opt for unbleached flour for better gluten development, which ensures the cookies hold their shape. If you’re looking for a substitution, try swapping with whole wheat flour for a nuttier flavor, but reduce the amount by 1/4 cup to avoid a heavier texture.
Unsweetened Cocoa Powder (2 tablespoons): The heart of red velvet’s flavor, this ingredient adds a deep, chocolatey richness that complements the red hue. Use high-quality, Dutch-processed cocoa for a smoother taste and better color. For a substitution, natural cocoa powder works in a pinch, but it may alter the acidity and final texture of your Red Velvet Crinkle Cookies—adjust baking soda if needed.
Baking Powder (1 teaspoon) and Baking Soda (1/4 teaspoon): These leavening agents are crucial for the rise and crinkle effect in Red Velvet Crinkle Cookies. Baking powder provides a steady lift, while baking soda reacts with the cocoa’s acidity for that perfect puff. Always check for freshness to avoid flat cookies; substitute baking powder with a mix of cream of tartar and baking soda if you’re out.
Salt (1/4 teaspoon): This enhances the overall flavor profile of your Red Velvet Crinkle Cookies, balancing the sweetness and highlighting the cocoa. Use fine sea salt for even distribution. If salt-restricted, reduce to a pinch, but don’t omit it entirely, as it brings out the red velvet’s subtle tang.
Unsalted Butter (1/2 cup, softened): Butter contributes to the rich, creamy texture and mouthfeel of Red Velvet Crinkle Cookies. Choose high-fat butter for the best results, as it prevents the cookies from becoming greasy. For a dairy-free option, substitute with vegan butter, but chill the dough longer to maintain the crinkle.
Granulated Sugar (1 cup): This sweetens and tenderizes the dough, creating the chewy consistency we love in Red Velvet Crinkle Cookies. Use organic sugar if possible for a cleaner taste. Substitute with coconut sugar for a slight caramel note, though it may darken the color slightly.
Eggs (2 large): Eggs bind the ingredients and add moisture, ensuring your Red Velvet Crinkle Cookies are soft and cohesive. Fresh, room-temperature eggs work best for even incorporation. For vegan Red Velvet Crinkle Cookies, use flax eggs (1 tablespoon flaxseed meal + 3 tablespoons water per egg) to maintain structure.
Red Food Coloring (1 tablespoon): This gives your Red Velvet Crinkle Cookies their iconic vibrant red shade. Opt for gel-based coloring for a more intense hue with less liquid. For a natural alternative, use beet juice, but note it may slightly alter the flavor and require more for the same effect.
Vanilla Extract (1 teaspoon): Vanilla enhances the aroma and depth of flavor in Red Velvet Crinkle Cookies. Always choose pure extract over imitation for authentic taste. If you’re out, almond extract can substitute, adding a nutty twist that pairs well with the cocoa.
Powdered Sugar (1/2 cup for rolling): This creates the snowy, crinkled exterior of Red Velvet Crinkle Cookies. Sift it for a smooth coating. For a healthier option, use a blend with cornstarch, but ensure it’s finely ground to avoid grainy results.
Step-by-Step Instructions
Step 1: Preheat the Oven
Start by preheating your oven to 350°F (175°C) and lining your baking sheets with parchment paper to prevent sticking and ensure even baking. This step is crucial for getting that perfect crinkle on your Red Velvet Crinkle Cookies.
Pro Tip: Use a reliable oven thermometer to verify the temperature, as an inaccurate oven can affect the crinkle formation and lead to unevenly baked cookies.
Step 2: Mix the Dry Ingredients
In a medium bowl, whisk together the 2 cups of all-purpose flour, 2 tablespoons of unsweetened cocoa powder, 1 teaspoon of baking powder, 1/4 teaspoon of baking soda, and 1/4 teaspoon of salt until fully combined. This creates a uniform base for your Red Velvet Crinkle Cookies.
Common Mistake to Avoid: Don’t over-whisk the dry ingredients, as this can activate the leavening agents too early and result in tough cookies—mix just until blended.
Step 3: Cream the Butter and Sugar
In a large bowl, use a hand mixer or stand mixer to cream the 1/2 cup of softened unsalted butter and 1 cup of granulated sugar until light and fluffy, about 2-3 minutes. This incorporates air, which helps with the soft texture of Red Velvet Crinkle Cookies.
Pro Tip: Ensure your butter is at room temperature for easier creaming; cold butter can leave lumps and affect the cookie’s rise.
Step 4: Add the Eggs and Flavorings
Beat in the 2 large eggs one at a time, mixing well after each addition, then stir in the 1 tablespoon of red food coloring and 1 teaspoon of vanilla extract until the mixture is evenly colored and smooth.
Common Mistake to Avoid: Add the food coloring gradually to control the intensity and avoid staining—wipe any spills immediately to prevent mishaps.
Step 5: Combine Wet and Dry Ingredients
Gradually add the dry ingredients to the wet mixture, mixing on low speed until just combined. Over-mixing can lead to dense cookies, so stop as soon as the dough comes together for your Red Velvet Crinkle Cookies.
Pro Tip: Use a spatula for the final stir to incorporate any flour at the bottom, ensuring a consistent dough.
Step 6: Chill the Dough
Cover the dough and chill it in the refrigerator for at least 1 hour. This step is our expert technique that firms up the dough and promotes the crinkle effect in Red Velvet Crinkle Cookies.
Common Mistake to Avoid: Skipping or shortening the chill time can cause the cookies to spread too much—always chill for the full hour for optimal results.
Step 7: Form and Roll the Cookies
Scoop tablespoon-sized balls of dough, roll them generously in the 1/2 cup of powdered sugar, and place them on the prepared baking sheets, spacing them about 2 inches apart.
Pro Tip: Use a cookie scoop for uniform sizes, which helps in achieving even baking and a professional look for your Red Velvet Crinkle Cookies.
Step 8: Bake the Cookies
Bake the cookies for 10-12 minutes, or until they are set with a crinkled top. Keep a close eye to prevent over-baking, as this maintains the soft and chewy center.
Common Mistake to Avoid: Don’t open the oven door too early, as it can cause the cookies to deflate and lose their crinkle—wait until the minimum time has passed.
Step 9: Cool the Cookies
Allow the cookies to cool on the baking sheet for a few minutes before transferring them to a wire rack to finish cooling completely. This helps them set without breaking.
Pro Tip: Cooling on the sheet locks in the crinkle and prevents sogginess, ensuring your Red Velvet Crinkle Cookies stay fresh.
Serving & Presentation
Elevate your Red Velvet Crinkle Cookies with creative plating by arranging them on a rustic wooden board alongside fresh berries for a pop of color and contrast. Dust with extra powdered sugar for a snowy effect, or add a drizzle of cream cheese icing to enhance the classic red velvet flavor. These cookies pair beautifully with a cup of coffee or hot cocoa, making them ideal for dessert spreads, or as a sweet finish to a holiday meal. For special occasions, stack them in a tower and garnish with mint leaves for an impressive, Instagram-worthy presentation.
Make-Ahead & Storage Solutions
Make-Ahead Strategy: Prepare the dough up to 3 days in advance by mixing all ingredients, shaping into balls, and storing them in an airtight container in the refrigerator. This allows the flavors to meld, enhancing the red velvet taste, and makes baking day a breeze—just roll in powdered sugar before baking.
Storing Leftovers: Store cooled Red Velvet Crinkle Cookies in an airtight container at room temperature for up to 5 days to maintain their soft and chewy texture. For longer storage, freeze them in a freezer-safe bag for up to 3 months, separating layers with parchment paper to prevent sticking.
The Best Way to Reheat: To restore the original texture and flavor, reheat frozen cookies in a 300°F oven for 5-7 minutes or microwave them for 10-15 seconds. This gentle warming revives the crinkle and softness without making them tough.

Frequently Asked Questions (FAQ)
How do you get the crinkle effect on red velvet crinkle cookies?
The crinkle effect on Red Velvet Crinkle Cookies comes from chilling the dough for at least an hour, which allows the ingredients to firm up and creates surface tension. When baked, the powdered sugar coating cracks as the cookies rise, revealing the vibrant red interior. Ensure your oven is at the right temperature and avoid over-baking for the best results.
What can I substitute for buttermilk in red velvet crinkle cookies?
This recipe doesn’t use buttermilk, but if you’re adapting it or comparing to traditional versions, you can substitute 1/2 cup of milk mixed with 1/2 tablespoon of vinegar or lemon juice. Let it sit for 5 minutes to curdle before adding. This mimics the acidity needed for the red velvet flavor, though our version relies on cocoa and eggs for texture, so adjustments might be minimal.
How long do you bake red velvet crinkle cookies?
Bake Red Velvet Crinkle Cookies for 10-12 minutes at 350°F (175°C) until they are set with a crinkled top. The exact time can vary based on your oven and cookie size, so start checking at 10 minutes— they should be soft in the center but not doughy. Over-baking can make them crisp instead of chewy.
What are some ways to serve red velvet crinkle cookies?
Serve Red Velvet Crinkle Cookies as a standalone dessert, paired with ice cream for a decadent treat, or crumble them over yogurt for a breakfast twist. They’re perfect for holiday platters, lunchbox snacks, or even as a topping for cheesecakes. For a fun variation, dip them in melted white chocolate to enhance their visual appeal and flavor profile.
Can these cookies be made ahead for events?
Yes, you can make the dough ahead and chill it for up to 3 days, or bake the cookies and store them as outlined. This makes Red Velvet Crinkle Cookies ideal for events, as they maintain their texture when reheated, saving you time on the day of your gathering.
Are Red Velvet Crinkle Cookies suitable for kids?
Absolutely, as long as you’re mindful of food allergies. These cookies are kid-friendly with their fun color and sweet taste, but if you’re concerned about the food coloring, use natural alternatives. They’re a great baking activity for children, teaching them about measuring and mixing.
Can I make this recipe gluten-free?
Yes, substitute the all-purpose flour with a 1:1 gluten-free flour blend to make gluten-free Red Velvet Crinkle Cookies. Add 1/4 teaspoon of xanthan gum if your blend doesn’t include it, to help with binding and achieve that perfect chewy texture. Test a small batch first, as gluten-free baking can vary.
Tried This Recipe? Leave a Comment!
Did you make this recipe? I’d love to hear how it turned out! Please leave a comment and a rating below. Your feedback helps other home cooks and supports lalytarecipes!
For more delicious inspiration, follow me on Pinterest!
Red Velvet Crinkle Cookies
- Total Time: 1 hour 25 minutes
- Yield: 24 cookies 1x
Description
Soft and chewy red velvet cookies with a crinkled top, made with cocoa powder and a touch of red food coloring for that classic flavor and appearance.
Ingredients
- 2 cups all-purpose flour
- 2 tablespoons unsweetened cocoa powder
- 1 teaspoon baking powder
- 1/4 teaspoon baking soda
- 1/4 teaspoon salt
- 1/2 cup unsalted butter, softened
- 1 cup granulated sugar
- 2 large eggs
- 1 tablespoon red food coloring
- 1 teaspoon vanilla extract
- 1/2 cup powdered sugar for rolling
Instructions
- Preheat your oven to 350°F (175°C) and line baking sheets with parchment paper.
- In a medium bowl, whisk together the flour, cocoa powder, baking powder, baking soda, and salt.
- In a large bowl, cream the softened butter and granulated sugar until light and fluffy.
- Beat in the eggs one at a time, then stir in the red food coloring and vanilla extract.
- Gradually add the dry ingredients to the wet ingredients, mixing until just combined.
- Cover the dough and chill in the refrigerator for at least 1 hour.
- Scoop tablespoon-sized balls of dough, roll them in powdered sugar, and place on the prepared baking sheets.
- Bake for 10-12 minutes, or until the cookies are set and have a crinkled top.
- Allow the cookies to cool on the baking sheet for a few minutes before transferring to a wire rack.
Notes
For best results, ensure the dough is well-chilled to achieve the perfect crinkle effect. Store in an airtight container for up to 5 days.
- Prep Time: 15 minutes
- Cook Time: 10 minutes
- Method: Dessert
- Cuisine: American
Nutrition
- Calories: 150
- Sugar: 12g
- Fat: 7g
- Carbohydrates: 20g
- Protein: 2g
Conclusion
Red Velvet Crinkle Cookies are a delightful indulgence, blending rich chocolate flavors with a subtle tang from cream cheese, creating a soft and chewy treat that’s perfect for holiday gatherings or everyday desserts. Their signature crinkled tops and vibrant red hue make them as visually appealing as they are delicious, capturing the essence of classic baking with a fun twist. For a serving tip, pair them with a cold glass of milk to enhance their moist texture, or try a variation by swapping in dark cocoa for a deeper chocolate profile to suit your taste preferences.


