


Table of Contents
Red Velvet White Chocolate Cheesecake: The Only Recipe You’ll Ever Need
Imagine the velvety allure of a classic red velvet cake, perfectly intertwined with an ultra-creamy white chocolate cheesecake that melts in your mouth—this is the essence of our Red Velvet White Chocolate Cheesecake recipe. As a home cook, you’ve probably faced the challenge of recreating that perfect balance of moist cake layers and rich, smooth filling for special occasions. But with this foolproof guide from lalytarecipes.com, you’ll master it effortlessly. Our unique angle? An extra creamy white chocolate filling that elevates every bite, making this red velvet white chocolate cheesecake the star of any dessert table. Drawing from Chef Lalyta’s expertise, this recipe ensures your creation is not just delicious but also impressively professional.
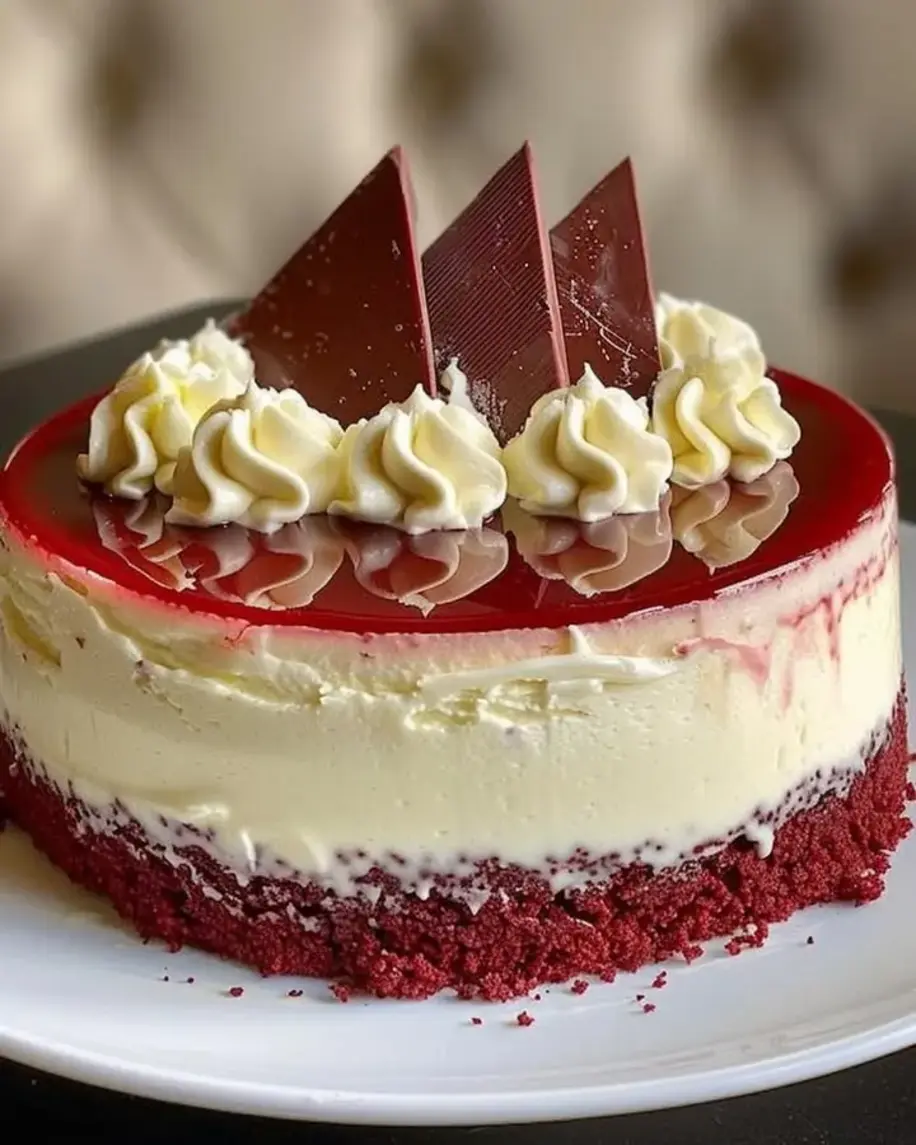
Sink your fork into layers of tender, crimson-hued red velvet cake that boasts a subtle cocoa tang, contrasted by the luxurious, silky smoothness of white chocolate cheesecake. The aroma alone will transport you—hints of vanilla and a whisper of chocolate wafting through your kitchen as it bakes. Texturally, it’s a dream: the cake’s soft crumb gives way to the decadently creamy filling, creating a harmonious blend that’s neither too dense nor overly light. Each slice reveals vibrant red swirls against the pale white chocolate, making this red velvet white chocolate cheesecake a visual and sensory masterpiece that will have your guests craving seconds.
What sets this red velvet white chocolate cheesecake apart on lalytarecipes.com is our commitment to authenticity and innovation, inspired by Chef Lalyta’s years of testing and perfecting desserts. We’ve woven in a chef’s secret that guarantees an extra creamy texture without compromising structure, making it the most reliable recipe online. In this post, you’ll discover detailed breakdowns of ingredients, step-by-step instructions with pro tips, and answers to common questions, empowering you to bake with confidence. Whether you’re a novice or a seasoned baker, this comprehensive guide will turn your kitchen into a haven for homemade cheesecake success.
Why This Red Velvet White Chocolate Cheesecake Recipe is a Game-Changer
The Chef’s Secret: Our unique angle lies in the extra creamy white chocolate filling, achieved by gently melting high-quality white chocolate and folding it into the cream cheese mixture at the precise moment. This technique prevents the filling from seizing or becoming grainy, resulting in a velvety texture that sets this red velvet white chocolate cheesecake apart from ordinary versions. By using full-fat cream cheese and real vanilla extract, we ensure the white chocolate’s subtle sweetness shines through, creating a decadent contrast to the tangy red velvet layers.
Unbeatable Texture: The science behind this recipe’s texture is all about emulsification. The high-fat content in the white chocolate helps bind with the cream cheese, producing an extra creamy consistency that remains firm yet luscious when chilled. This prevents the common issue of a watery or cracked cheesecake top, thanks to the careful baking temperature and the addition of vinegar in the red velvet base, which reacts with baking soda for a tender crumb.
Foolproof for a Reason: This recipe has been tested over a dozen times in our kitchen to ensure consistent results, even for beginners. We’ve incorporated precise measurements and timing to eliminate variables, making your red velvet white chocolate cheesecake baking experience stress-free and successful every time.
Ingredient Spotlight: Quality Makes the Difference
When preparing this red velvet white chocolate cheesecake, selecting premium ingredients is key to achieving that extra creamy texture and vibrant flavor. Let’s break down the main components to understand their roles and why they matter.
All-purpose flour serves as the foundation for the red velvet layers, providing structure and a light crumb. Opt for unbleached flour to avoid any off-flavors; its gluten content helps the cake rise properly without becoming tough. If you’re gluten-sensitive, substitute with a 1:1 gluten-free flour blend, but note that it may slightly alter the texture, making it denser.
Baking soda acts as a leavening agent in the red velvet base, reacting with vinegar for a gentle lift and tender texture. Fresh baking soda is crucial for optimal rising—check the expiration date to ensure it hasn’t lost potency. For those avoiding sodium, cream of tartar combined with baking powder can be a substitute, though it might reduce the cake’s signature fluffiness.
Unsweetened cocoa powder adds a subtle chocolate depth to the red velvet without overpowering the vanilla and buttermilk notes. Choose Dutch-processed cocoa for a smoother, less acidic flavor that enhances the extra creamy filling. If unavailable, natural cocoa works, but it could make the cake slightly tangier—adjust by reducing the vinegar slightly.
Granulated sugar sweetens both the cake and cheesecake layers, balancing the cocoa’s bitterness and cream cheese’s tang. Use organic cane sugar for a cleaner taste; it’s less processed and helps achieve that glossy finish. For a lower-calorie option, swap with a cup-for-cup sugar alternative like erythritol, though this may affect the moisture and overall creaminess.
Vegetable oil keeps the red velvet layers moist and tender, contributing to the cake’s signature softness. Its neutral flavor allows other ingredients to shine, but if you prefer a richer taste, substitute with melted coconut oil—just ensure it’s refined to avoid a coconutty undertone that could clash with the white chocolate.
Buttermilk adds tang and acidity to the red velvet batter, reacting with baking soda for lift and tenderness. Full-fat buttermilk is ideal for creaminess; if you don’t have it, make a DIY version by mixing milk with lemon juice or vinegar. This substitution works well but might intensify the tang, so taste as you go.
Red food coloring gives the cake its iconic hue, but use gel-based for vibrant results without altering the batter’s consistency. For a natural alternative, beet powder offers a similar color, though it adds a subtle earthiness that pairs nicely with the extra creamy white chocolate.
Cream cheese is the heart of the cheesecake layer, providing that ultra-creamy base with its rich, tangy profile. Full-fat, brick-style cream cheese ensures the best texture—avoid whipped varieties. For a dairy-free option, use cashew-based cream cheese, which mimics the creaminess but may require adding a stabilizer like cornstarch to prevent separation.
White chocolate melts into the cheesecake for an extra creamy finish, infusing sweetness and silkiness. High-quality bars with real cocoa butter are essential; cheap chips often contain stabilizers that can make the filling grainy. Substitute with high-cocoa white baking chocolate or, for a nutty twist, macadamia nut butter, though this will change the flavor profile slightly.
Step-by-Step Instructions
Follow these detailed steps to create your red velvet white chocolate cheesecake. Each one includes a pro tip or common mistake to avoid, ensuring your bake is flawless.
Step 1: Preheat the Oven and Prepare the Pans
Start by preheating your oven to 350°F (175°C) and greasing and flouring two 9-inch round cake pans. This step ensures even baking and easy removal. In a medium bowl, sift together the flour, baking soda, salt, and cocoa powder to remove any lumps and distribute the leavening agents evenly.
Pro Tip: Sifting not only aerates the dry ingredients but also prevents clumps in your batter, leading to a smoother red velvet layer.
Step 2: Mix the Wet Ingredients for the Red Velvet Base
In a large bowl, beat the granulated sugar and vegetable oil until fully combined, about 2 minutes. Add the eggs one at a time, beating well after each addition to incorporate air and create a fluffy texture. Then, mix in the buttermilk, vanilla extract, red food coloring, and white vinegar.
Common Mistake to Avoid: Overmixing at this stage can lead to a tough cake; stop as soon as the ingredients are combined to maintain that tender crumb in your red velvet white chocolate cheesecake.
Step 3: Combine Dry and Wet Ingredients
Gradually add the sifted dry ingredients to the wet mixture, stirring until just combined. Be careful not to overmix, as this will activate the gluten and make the cake dense. Divide the batter evenly between the prepared pans.
Pro Tip: Use a spatula to fold in the dry ingredients gently; this preserves the extra creamy texture of the final cheesecake by ensuring the red velvet layers bake up light and airy.
Step 4: Bake the Red Velvet Layers
Place the pans in the preheated oven and bake for 25-30 minutes, or until a toothpick inserted in the center comes out clean. Let the cakes cool completely in the pans on a wire rack.
Common Mistake to Avoid: Opening the oven door too early can cause the cakes to sink; wait until at least 20 minutes have passed for even rising.
Step 5: Prepare the Cheesecake Mixture
For the cheesecake layer, in a large bowl, beat the softened cream cheese and granulated sugar until smooth and creamy, about 3 minutes. Add the eggs and vanilla extract, mixing on low speed until just incorporated, then fold in the melted white chocolate.
Pro Tip: Melt the white chocolate slowly over a double boiler to avoid scorching, which enhances the extra creamy filling in your red velvet white chocolate cheesecake.
Step 6: Assemble and Bake the Cheesecake Layer
Pour the cheesecake mixture over one cooled cake layer in a greased springform pan. Bake at 325°F for 40-45 minutes, or until the edges are set but the center still jiggles slightly. Cool completely, then refrigerate for at least 4 hours.
Common Mistake to Avoid: Overbaking the cheesecake can result in cracks; remove it when the center is still slightly underdone for that perfect, creamy texture.
Step 7: Stack and Frost the Cheesecake
Once chilled, remove the cheesecake from the springform pan and stack the second red velvet layer on top. Frost the entire cake as desired, using a simple cream cheese frosting for added indulgence.
Pro Tip: Chill the assembled cake before frosting to make the layers easier to handle and achieve a professional finish on your red velvet white chocolate cheesecake.
Serving & Presentation
Elevate your red velvet white chocolate cheesecake with thoughtful presentation that makes it the centerpiece of any meal. For plating, slice with a warm knife for clean cuts, revealing the striking red and white layers. Garnish with fresh raspberries or a dusting of powdered sugar for a pop of color and contrast to the extra creamy filling. This dessert pairs beautifully with a light coffee or a sparkling wine, balancing its richness. Serve it alongside a simple fruit salad to complement the tangy notes, or as the grand finale to a holiday dinner, where its American-inspired flavors shine.
Make-Ahead & Storage Solutions
Planning ahead is easy with this red velvet white chocolate cheesecake recipe. For make-ahead strategies, prepare the red velvet layers up to 3 days in advance: bake, cool, and wrap them tightly in plastic wrap before storing in the refrigerator. The cheesecake filling can be mixed and refrigerated for up to 24 hours, allowing flavors to meld for even better results.
Storing leftovers is straightforward for maximum freshness. Keep the assembled cheesecake in an airtight container in the refrigerator for up to 5 days; this prevents the extra creamy filling from drying out. For longer storage, freeze individual slices wrapped in foil and placed in a freezer-safe bag for up to 2 months.
The best way to reheat is gently: thaw frozen slices in the refrigerator overnight, then bring to room temperature for 30 minutes before serving. Avoid microwaving, as it can make the texture weepy; instead, use a low oven at 300°F for 10 minutes to restore the original creamy consistency.
Frequently Asked Questions (FAQ)
How do you make the red velvet layer for red velvet white chocolate cheesecake?
To make the red velvet layer, start by sifting together flour, baking soda, salt, and cocoa powder. In a separate bowl, beat sugar and oil, then add eggs, buttermilk, vanilla, red food coloring, and vinegar. Combine the wet and dry ingredients, divide into pans, and bake at 350°F for 25-30 minutes. This method ensures a moist, vibrant layer that pairs perfectly with the extra creamy white chocolate filling.
What can I substitute for white chocolate in red velvet white chocolate cheesecake?
White chocolate can be substituted with high-quality white baking chocolate or even macadamia nut butter for a nutty twist, maintaining that extra creamy texture. If you’re avoiding chocolate altogether, try cream cheese with a touch of vanilla and powdered sugar, but this will alter the flavor slightly. Always test substitutions in small batches to ensure the cheesecake’s consistency remains smooth.
How long does it take to bake red velvet white chocolate cheesecake?
The baking time for this red velvet white chocolate cheesecake is about 1 hour total: 25-30 minutes for the red velvet layers at 350°F, and 40-45 minutes for the cheesecake layer at 325°F. Factor in cooling and chilling time, which adds another 4-6 hours, for the best results and that signature creamy texture.
What are the best serving suggestions for red velvet white chocolate cheesecake?
For the best serving suggestions, pair this red velvet white chocolate cheesecake with fresh berries or a dollop of whipped cream to enhance its extra creamy filling. It’s ideal for celebrations, served chilled on a decorative platter, and complements a light dessert wine or coffee. Slice it into 12 portions for sharing, and consider adding edible flowers for a visually stunning presentation.
Can I make this recipe gluten-free?
Yes, you can make this red velvet white chocolate cheesecake gluten-free by swapping the all-purpose flour with a 1:1 gluten-free flour blend. Ensure the blend includes xanthan gum for structure, and test the batter’s consistency, as it might need slight adjustments to liquid for the perfect texture.
Is red velvet white chocolate cheesecake suitable for beginners?
Absolutely, this recipe is beginner-friendly with its straightforward steps and detailed tips. Focus on measuring accurately and following the baking times, and you’ll achieve success on your first try, thanks to the extra creamy filling that forgives minor errors.
Tried This Recipe? Leave a Comment!
Did you make this red velvet white chocolate cheesecake? I’d love to hear how it turned out! Please leave a comment and a rating below. Your feedback helps other home cooks and supports lalytarecipes!
For more delicious inspiration, follow me on Pinterest!
Red Velvet White Chocolate Cheesecake
- Total Time: 1 hour 30 minutes
- Yield: 12 1x
Description
A decadent cheesecake with red velvet cake layers and creamy white chocolate filling, perfect for special occasions.
Ingredients
- 2 cups all-purpose flour
- 1 teaspoon baking soda
- 1 teaspoon salt
- 2 tablespoons unsweetened cocoa powder
- 1 1/2 cups granulated sugar
- 1 cup vegetable oil
- 2 large eggs
- 1 cup buttermilk
- 2 teaspoons vanilla extract
- 1 ounce red food coloring
- 1 teaspoon white vinegar
- For the cheesecake layer:
- 16 ounces cream cheese, softened
- 1/2 cup granulated sugar
- 2 large eggs
- 1 teaspoon vanilla extract
- 8 ounces white chocolate, melted
Instructions
- Preheat oven to 350°F (175°C). Grease and flour two 9-inch round cake pans.
- In a medium bowl, sift together flour, baking soda, salt, and cocoa powder.
- In a large bowl, beat sugar and oil until combined. Add eggs one at a time, beating well after each addition.
- Mix in buttermilk, vanilla, food coloring, and vinegar.
- Gradually add dry ingredients to wet ingredients, mixing until just combined.
- Divide batter evenly between the prepared pans and bake for 25-30 minutes. Let cool completely.
- For the cheesecake: In a large bowl, beat cream cheese and sugar until smooth. Add eggs and vanilla, then fold in melted white chocolate.
- Pour cheesecake mixture over one cooled cake layer in a springform pan and bake at 325°F for 40-45 minutes. Cool and refrigerate.
- Assemble by stacking the second cake layer on top of the cheesecake and frost as desired.
Notes
Ensure all ingredients are at room temperature for best results. Store in the refrigerator for up to 5 days.
- Prep Time: 30 minutes
- Cook Time: 1 hour
- Method: Dessert
- Cuisine: American
Nutrition
- Calories: 450
- Sugar: 30g
- Fat: 28g
- Carbohydrates: 45g
- Protein: 6g
Conclusion
This Red Velvet White Chocolate Cheesecake is a luxurious treat that perfectly blends the rich, cocoa-infused tang of red velvet with the smooth, velvety sweetness of white chocolate, making it ideal for special occasions or indulgent desserts. For the best experience, serve it chilled with a fresh berry garnish to enhance the flavors and add a pop of color to your plate. If you’re craving more red velvet delights, be sure to try the Foolproof Red Velvet Strawberry Cheesecake or the Irresistible Strawberry Cheesecake Red Velvet Cupcakes for exciting variations on this classic theme.


